Navigation
About the Xbow® (Crossbow®) Class II Corrector
Testimonial from Dr. Herb Hughes
“Our Orthodontic Study Club flew Dr. Higgins across North America to address our membership and to learn about his appliance and treatment philosophy. My patients and I couldn’t be more pleased with the results from Dr. Higgins’ Crossbow appliance! It has shortened their length of treatment time and delivered a superior final result. Dr. Higgins is a pioneer in the orthodontic field and is very well respected amongst his peers. Thanks for caring enough to share your ideas with our orthodontic community!”
– Dr. Herb Hughes, President – Northern Virginia Orthodontic Study Club
XBOW Two Phase Class II Treatment
- Half the battle is getting the brackets in the right place and using an efficient system of mechanics in phase two.
- The other half is what you do while you wait for the second molars to erupt, and…
- What you do between the eruption of the maxillary first bicuspids and the second molars.
The Xbow® system focuses on hitting phase one targets so there is less to do in phase two. The critical components of Xbow® phase one are:
- Beginning after the maxillary first bicuspids erupt to make space for the erupting canines.
- The RME is essential as practically all Class II’s require maxillary expansion.
- The Triple “L” Arch allows the use of Class II springs with the RME to distalize the maxillary bicuspids and molars, correct the overjet and open space for maxillary canines in phase one.
- The Class II spring side effects, such as posterior openbite, settle before phase 2, instead of the need for elastics late in single-phase treatment.

Clinical Use of the Xbow Appliance
- Maxillary expansion if a posterior crossbite exists or if there is maxillary constriction.
- Maxillary incisor alignment, if necessary.
- Distalization and over-correction of the maxillary bicuspids and molars to open space for maxillary canines,
- Compensatory maxillary expansion, if necessary,
- Expansion retention and replacement of springs on one or both sides, if necessary, and
- Phase 2 Alignment, overbite correction, space closure, and arch coordination using a full edgewise appliance or aligners.
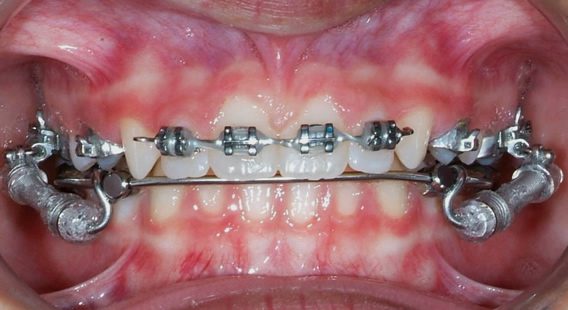
The Xbow is made up of a maxillary expansion appliance, the Triple “L” Arch®, the 3M Unitek Forsus Fatigue Resistant Device with “L” pins, 22 mm Direct Push Rods, and Gurin locks (3M Unitek large size Order #560-400) or Large Rocky Mountain Locks (preferred).
Don’t forget to order a Gurin lock or Rocky Mountain lock wrench.
Ask for the Dentaurum “Variety” two-leg expansion screw. There is less chance of palatal impingement with distal tipping and intrusion of the first molars than with a four-leg screw design. If the patient has a posterior crossbite or a narrow maxilla, expand the maxilla first. It makes it easier for a patient with a narrow maxilla to attach the Forsus device if you expand the maxilla first. If more than 12 mm of expansion is necessary then use a SuperScrew.
Band the upper 6’s and the upper 4’s. Control of the upper first bicuspids is important if the goal is overcorrection and the bite-catching effect of the first bicuspids. Fit the bands and take an alginate impression. Place the bands in the impression and secure them with sticky wax.
Pour the impression and check the band position before sending the case to the lab. Dr. Bob Miller places compound material over the bands before taking the alginate impression. This method ensures that the band placement in the impression is correct.
Another method is to place separators for a week, remove the separators, take impressions, and replace the separators. Send the models (or impressions) to the lab. The lab will fit bands on the models. You can use VPS impression material if you want the lab to pour the model. Don’t try to take an impression of the bands on the teeth with VPS. It’s difficult enough trying to get those impressions out of the mouth WITHOUT bands.
An alternate method is to take alginate or digital impressions with a scanner. Place separators on the upper and lower first molars only after the impressions or scan is taken. (Don’t ask me how this works, but it does).
The lab will fit bands on the first molars and place occlusal rests on the upper and lower first bicuspids (and upper second molars if they have erupted). Micro-etching the occlusal rests and bonding them to the teeth is critical with this technique, especially to the upper first bicuspids when bands are not used.

Xbow on printed models from an iTero digital scan by Dr. Bob Miller. Use occlusal headgear tubes on the upper 6’s to attach the Forsus springs.
Once space is gained from the expansion, use an upper RME X 4 or RME X 6, if necessary. After alignment, segment the archwire distal to the lateral incisor or canine. This allows over-correction of the Class II buccal segments and opening space for the upper canines without over-retracting the upper incisors.
If the upper incisors are well aligned and the maxilla doesn’t need expanding initially, cement the maxillary expander and the Triple “L” Arch simultaneously and place the springs immediately or one week later. If you need to expand the maxilla, wait to cement the Triple “L” Arch until you can attach the springs.
Microetch the bands and occlusal rests just before cementation. We use the Unitek™ Multi-Cure Glass Ionomer Band Cement from 3M Unitek. This powder-liquid cement has a long working time and can be light cured. We rarely have a loose band.
Bond the occlusal rests with Transbond™ Supreme LV Low Viscosity Light Cure Adhesive. If the upper second molars have erupted, bond an occlusal rest to prevent the first molars from intruding too much.
Occlusal rests for the maxillary second molars can be placed even if they are erupting and still mostly covered with soft tissue. The rest can be placed at the soft tissue level so that when the second molar erupts further, the rest will contact the occlusal surface. It is not necessary to bond the rest in this case.
If the labial bow is too close to the gingiva of the lower incisors, use a three-prong plier posteriorly to raise it. If the buccal section of the labial bow is too close to the teeth and the pushrod is hung up, use a three-prong plier from the occlusal on the spot with the least clearance to bow out the wire.
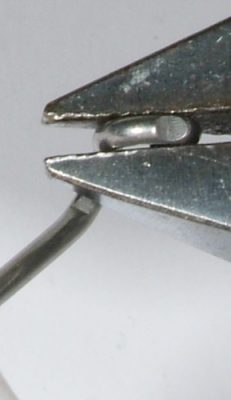
To open the pushrod loop enough to place it on the labial bow, squeeze the tips of a bird beak plier together through the opening. To remove the rod from the labial bow, take the end with your fingers and flip it anteriorly so that the labial bow passes through the loop opening.
See the patient every six weeks and overcorrect the maxillary first bicuspid to a half cusp Class III. This ensures that the bicuspid and molar root apices end up Class I after tipping has relapsed.
Using the Forsus device causes rapid over-correction, usually in four to five months. Fully compress the springs by distalizing the Gurin locks with the Gurin lock wrench.
A fully compressed spring will stay active longer as the patient opens. A fully compressed Forsus device has 200 grams of force and loses 20 grams for every 1 mm deactivation.
If you run out of length on the labial bow to reactivate the spring, you can either replace the pushrod with a longer one or use a “shorty” hook-up. A “shorty” hook-up uses an “L” pin inserted from the mesial of the headgear tube with a 22mm pushrod.
Once overcorrection has been achieved, remove the springs and Gurin locks and start the maxillary expansion, if necessary.
Test the stability of the Class II correction for a couple of months and replace the springs on one or both sides, if necessary. The goal is a socked-in Class I first bicuspid. If the lower e’s have not exfoliated, cut the labial bow and occlusal rest off.
We overcorrect maxillary expansion depending on the amount of constriction. If there is a complete bilateral crossbite, we overcorrect the upper molars into a buccal crossbite. If the crossbite is unilateral we overcorrect the non-crossbite side into a buccal crossbite.
If there is a crossbite tendency due to Class II correction, we overcorrect the molars until the upper molar’s lingual cusp tip contacts the lower molar’s buccal cusp tip on one side. We leave the RME in place to retain the expansion for five more months.
This allows us to check for Class II relapse two months after completing the expansion and replacing the Forsus spring on one or both sides.
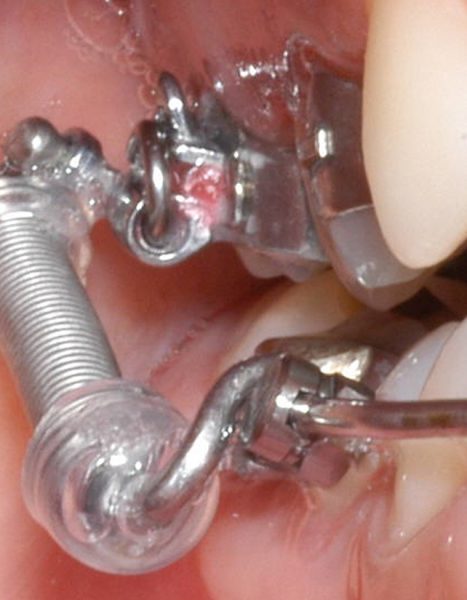
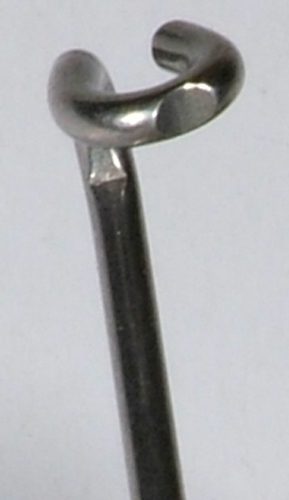
“L” Pin & Pushrod Adjustment
Xbow Comfort: Orthodontists are contacting Comfort Solutions after their patients experience sores. I recommend starting with anterior and posterior spring caps and having Spring Sleeves and Spi-Wrap on hand. Spi-Wrap is spiral-cut tubing that works well for sores from the lower labial bow and trans palatal arches.
Distal Hookup

Mesial Hookup
“Spring Sleeve” combined with anterior and posterior caps to form a “Comfort Capsule.” Spring Sleeves are used when the spring is irritating or catching the cheek. We are using “L” pins instead of EZ2 modules.
We find it is easier to adjust “L” pins to position the spring ideally. Insert the “L” pin with the attached spring into the headgear tube and let the spring and “L” pinfall straight down. Support the spring against maxillary teeth with your finger and bend the “L” pin straight back at 90 degrees to the ball and “axle.”
Rotate the spring so that the “axle” points slightly gingivally and the end of the pin is gingival and against the bracket.


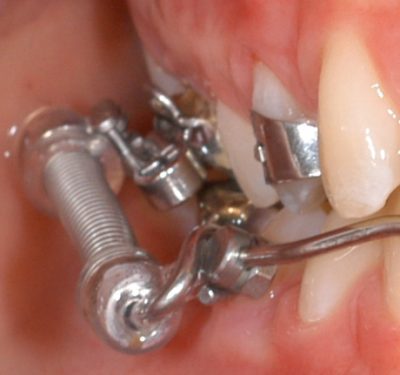
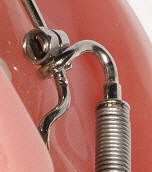
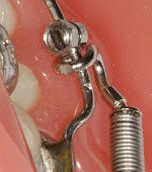
Begin with a straight 22 mm pushrod. We routinely rotate the Gurin Lock 180 degrees after completely tightening it. Then, we rotate it a few degrees clockwise to position the anterior spring (with cap) about 1 or 2 mm off the gingiva. If the spring or anterior cap still impinges on the gingiva or the posterior spring hits the lower labial bow or solder, bend the “L” pin gingivally (see below).
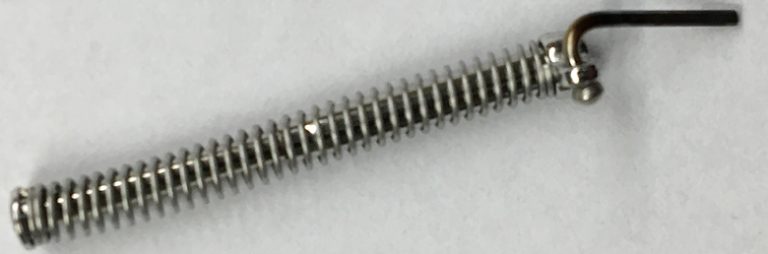
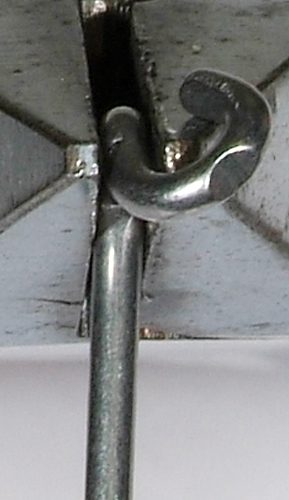
A straight “L” pin and mesial hookup with spring-touching gingiva are needed.

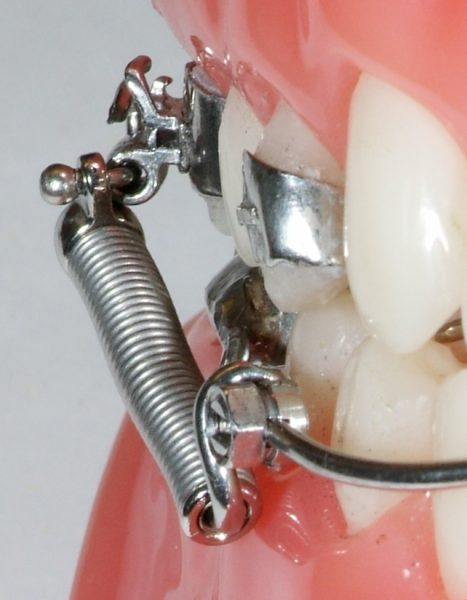
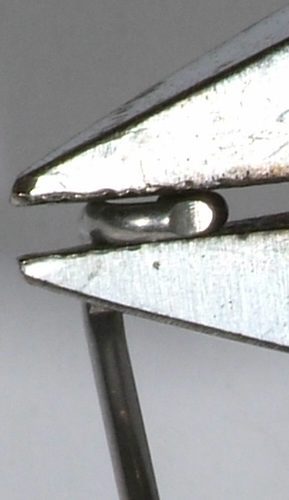
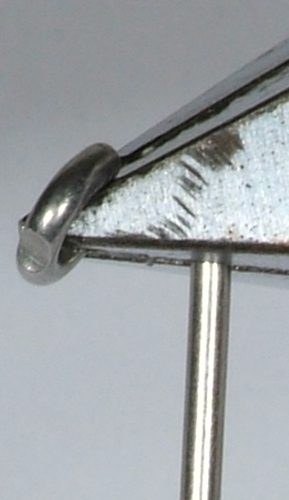
Bending pin gingivally with a fine bird beak plier.
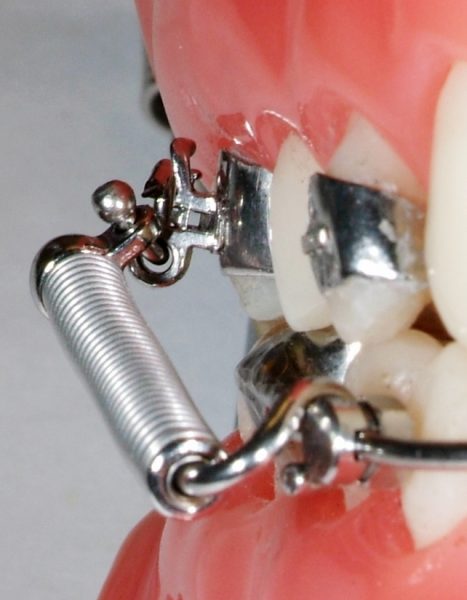
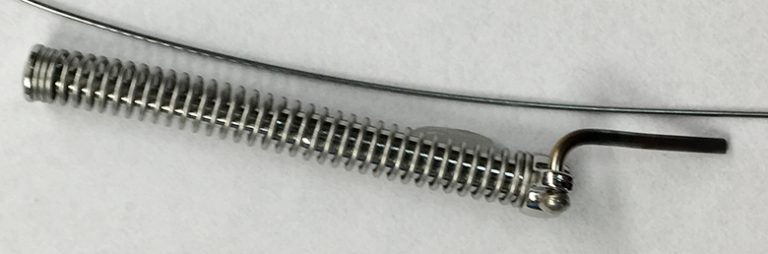
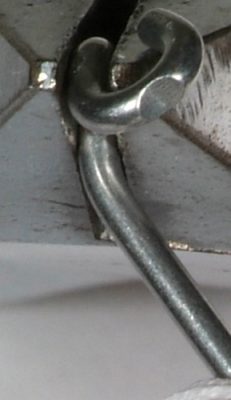
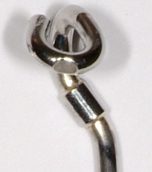
Buccal spring movement with a bent pin and Gurin lock rotated 180 degrees (22 mm pushrod).
The “L” pin bent up, and the Gurin lock spun 180 degrees to move the spring buccally.
“L” Pin Adjustment
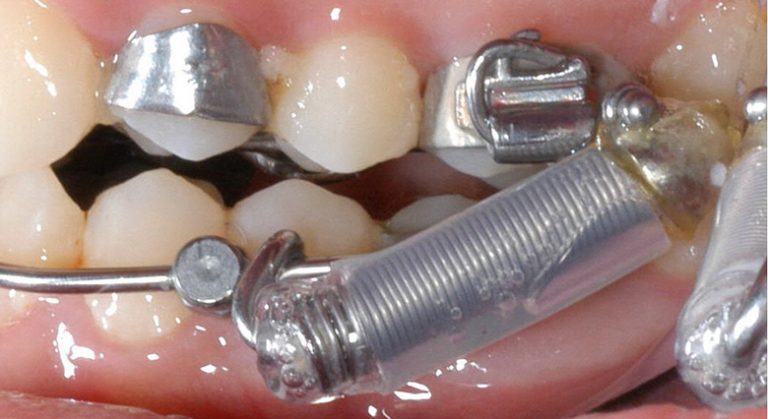
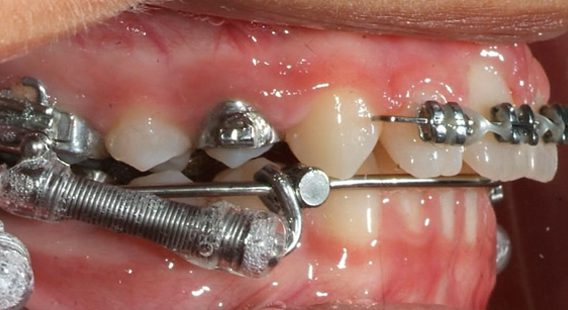
Adjust the “L” pin so the spring is parallel to the lower labial bow. This example shows a mesial hookup. This has to be right, or the pushrod will not function properly.
If the spring is too close to the gingiva, bend an offset (bayonet bend) anteriorly as possible on a 22 mm pushrod. (See Below)

Use a heavy plier such as an Adam’s. The first bend is 45 degrees towards the buccal. The second bend is made with the beak of the plier inserted into the loop of the pushrod. This second bend determines how far buccal the spring is. The more obtuse the angle between the rod and loop is, the more buccal the spring will be. In other words, opening the angle between the rod and loop moves the spring buccally.
If the bend is too obtuse, the loop will bind on the labial bow and will not slide, reducing the opening amount before the rod disengages from the spring. 22 mm pushrods with bayonet bend. If the pushrod connects too far posteriorly on the labial bow, it may be necessary to use a 25 or 29-mm pushrod OR a mesial hookup (see below).
If a 25 or 29-mm pushrod is used, a bayonet bend reduces lip impingement by the pushrod. Straight 25 mm rod and a 25 mm rod with bayonet bend. 25 mm rod with bayonet bend. Below is a video clip of Dr. Bob Miller bending a bayonet bend in a 25 mm pushrod.
EZ2 Clip Instructions
There is a greater chance of interference between the thicker clip and the lower molar solder joint. This may cause the upper molar bracket weld to fail or the band to tear. In this case, it is better to expand the maxilla before you place the springs or remove the anti-rotation arm (see photo: EZ2 with anti-rotation arm removed, 22 mm pushrod, and Gurin lock rotated 180 degrees).